Friday, April 30, 2010

♥ New Frankens ♥

above, my new frankens 3 thin coats each

Yippee - I whipped up a tonne of Frankens earlier in the week, They all turned out awesome and here is the first batch. I don't think I would purchase polish's in this colour family, so I made little mini batches. and even though I have worn all three of these this week, I cannot foresee myself  falling in love with these shades of green. The finish though, these little flecks courtesy of the Claire's Yellow Brick Road, is soooooooo cool.

Below are the polish I used to create these, Claire's Matte Cobalt and Claire's Yellow Brick Road. Claire's Matte Cobalt is an awesome rich blue, two coats and dried super- duper fast ( no manicure pic's sorry! ) while Yellow Brick Road needs almost 5 coats. I will try this polish again layered over a stark white.....


So this is what I started out with. I filled each bottle 1/2  way with the Yellow Brick Road, then ......

The first bottle got 5 drops, the second bottle got 10 drops, and the third got 16 ( it was supposed to be 15) and this is what resulted. I love the finish on these. The Claire's polish really added alot to these weird green colours. I wish I had another bottle of Yellow Brick Road to create some other neat polish's with this finish..... On it's own this polish 'Yellow Brick Road' is very sheer; I think when I wore it alone I needed almost 5 coats. It definitely needs to be layered over something else.

L to R - Cliche Green, Hulk 1 and Hulk 2

Don't worry the Icing polish's that were in these bottle were Y.U.C.K.Y. and were put to better use. I poured them into another bottle and rinsed out these lil' bottles with acetone. But I have to add that the bottle form the Dollarama in Canada are Fabulous!!!!!!! I will be adding a bunch of photos of the frankens I made with them on Monday, along with some notes..... here is a little teaser photo......


Anyhoo, here is a few skittles as well as the darkest green I call Hulk 2............

L to R - Hulk 2, Cliche Green, Hulk 1, and Cliche Green again ( no T.C. )


Thumb, Middle & Pinky = Cliche Green
INDEX Hulk 2 ( darkest )
RING = Hulk 1


Below is a few photos of Hulk 2, with only 1 coat of T.C. I love how these tiny little flecks can be seen in all the franken polish's I made with Claire's 'Yellow Brick Road'

shade

flash

Fluorescent No Top Coat, this ended up with a nice suede/satin like finish

Shade

Fluorescent

Have a Lovely Friday Night


Thursday, April 29, 2010

Nail Board things......


 I really, really wish I could have found something like this made already. I know nail wheels are awesome, but I like color swatches lined up in a row much better.

hot glue gun glue is hot 


♥ That should be name for one of my franken polish's.....just be careful whenever you use it ♥

Also if you decide to do this, and buy dollar store nails, make sure they are okay to polish, some cheap dollar store nails are NOT GOOD and will wrinkle and pucker when you apply polish to them ( why they even sell them.................... I don't know )

 When I painted these, I made sure to make an excel spreadsheet with the names of the polish and how many coats.  Eventually I plan to print them out on sticker paper and affix it to the back of each nail board thing.

I hope I sorta explained this properly I need to whip up a few more when i get more nails....I plan on doing a better job explaining with better photos....

So I would say, that this was a time consuming project. I glued 600 false nails to 1 1/2 inch by 8 inch pieces of foam board. My reason for doing things this way, was so when I open my top drawer of my Helmer or Melmer ( which I don't have....yet) these will be standing upright and I will easily be able to see all my polishes swatched. I wish I took pictures of the process = but I will be doing this again soon I just need to hop over to the Dollarama and grab more nails, though.

I also find that it will be much easier to photograph these swatches, if I add polish to these before I actually wear the polish.... by propping them up in my light box, or just a sheet of poster-board that I sometimes use.

Essentially, I cut up a piece of this lightweight foam board to the sizes I wanted and glued the nails on with a glue gun and hot glue. It was very easy but time consuming. In the evening I would just pop a movie on and go to town glue-ing. I laid the piece of foam board on a flat surface, and butted up another piece against it, so that when i applied a blob of hot glue to it and affixed the nail to the board it would stay I will work on a visual for that and when I hit the dollar store on the weekend, I may try to produce a video.

In total for 600 nails, it probably took 4 hours......however I actually enjoy these types of menial crafts and tasks, so it wasn't so bad.

I really just eyeballed where their placement was, but I suppose marking off where they should be would help to keep them spaced evenly..... as long as they stayed "straight'' to the actual board and lined up properly I am happy

Some of these nails had sharp edges, and that little bit of plastic left over from snapping them out of the mold at the factory. So I had to file most of them after they were glued down.


 below, the smaller piece of foam board I used to keep my false nails straight and prevent them from dropping off the edge of the foam board.


I butted the edges up like this, otherwise the hot glue would just make the nail dip and they would be all crooked ( dang this is hard to explain.... does any of this make sense? )


so..... see what I mean? If I hadn't used the other board to make sure the nails stayed in line, they would have 'dipped' down and been all wonky.....


My latest batch of Frankens..... ( the 'uglyies' get their own section )


oops, I should have straightened my camera out.....

These are the nails I used, I found these at Dollarama, I grabbed 6 boxes. ( I need more)

foam board from dollarrama - this comes in different colours and you can also get it at Walmart and craft stores, like Micheal's and Hobby Lobby..... 24x 28 each little piece I cut was 1 1/2 inch by 8 inches.


a new bridal illustration


that some of you may have caught over at style me pretty. She's wearing 2011 Oscar.


If you'd like to order your own custom bridal illustration simply email dallasshawdesign@gmail.com
also if you mention the style me pretty post you get 15% off of anything on the etsy page!

gene on the street


I love this picture of Gene Tierney. If you know anything abut me personally- you know that I love adding a bit of glam to my casual. I think my favorite thing about this is that it looks like it could have been taken by a street photographer today (but it is circa 1946).


I like to think if it were taken today, some of these favorites of mine may have shown up in the shot. (psst: check out the other amazing cacharel shoes at the link below!!)
dvf, burberry, cacharel

Wednesday, April 28, 2010

From Cuticle Crisis to Cuticle Care

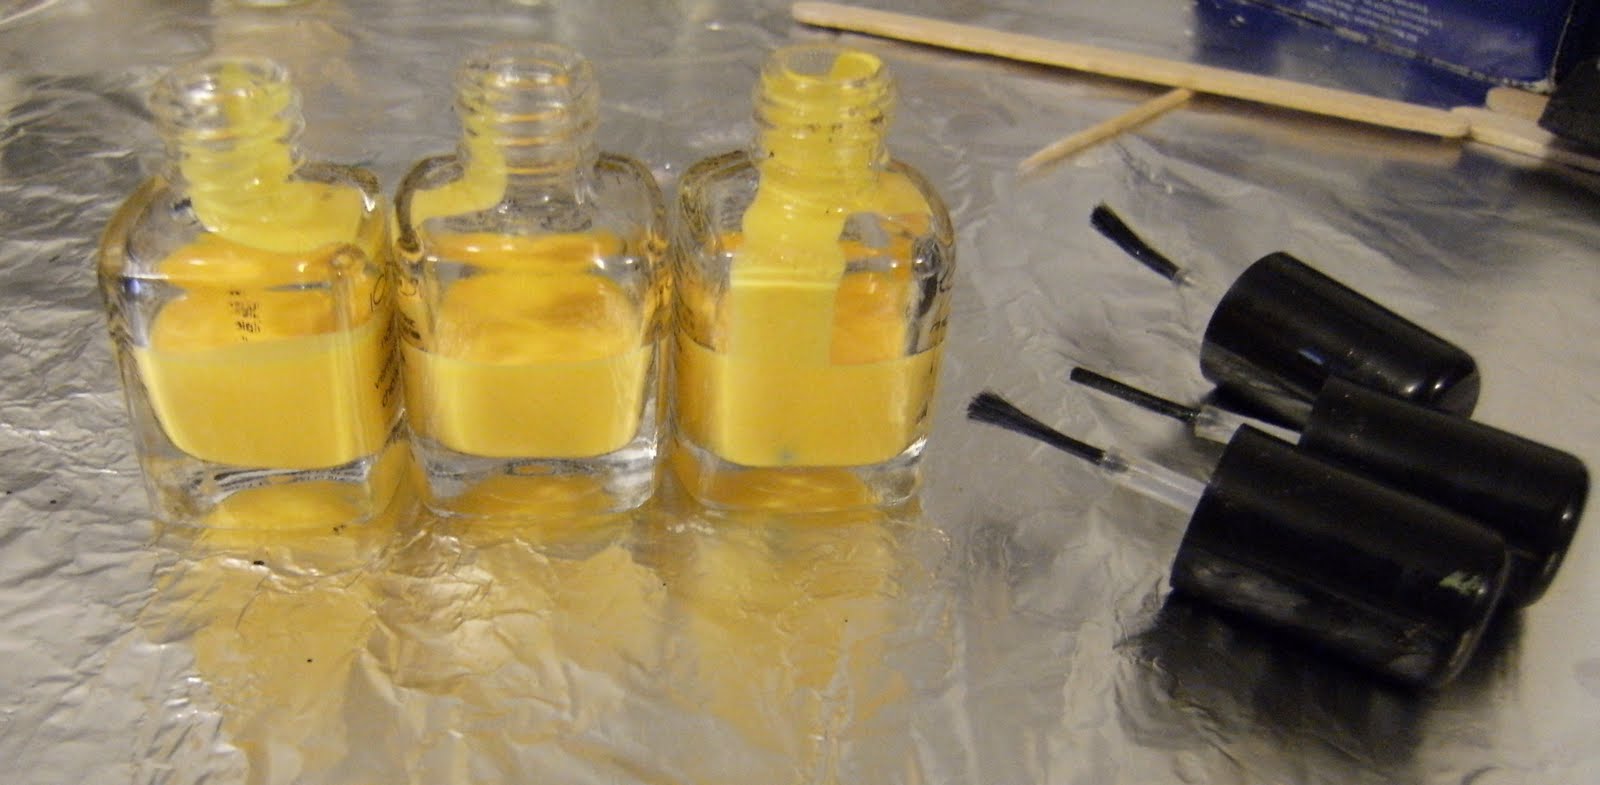
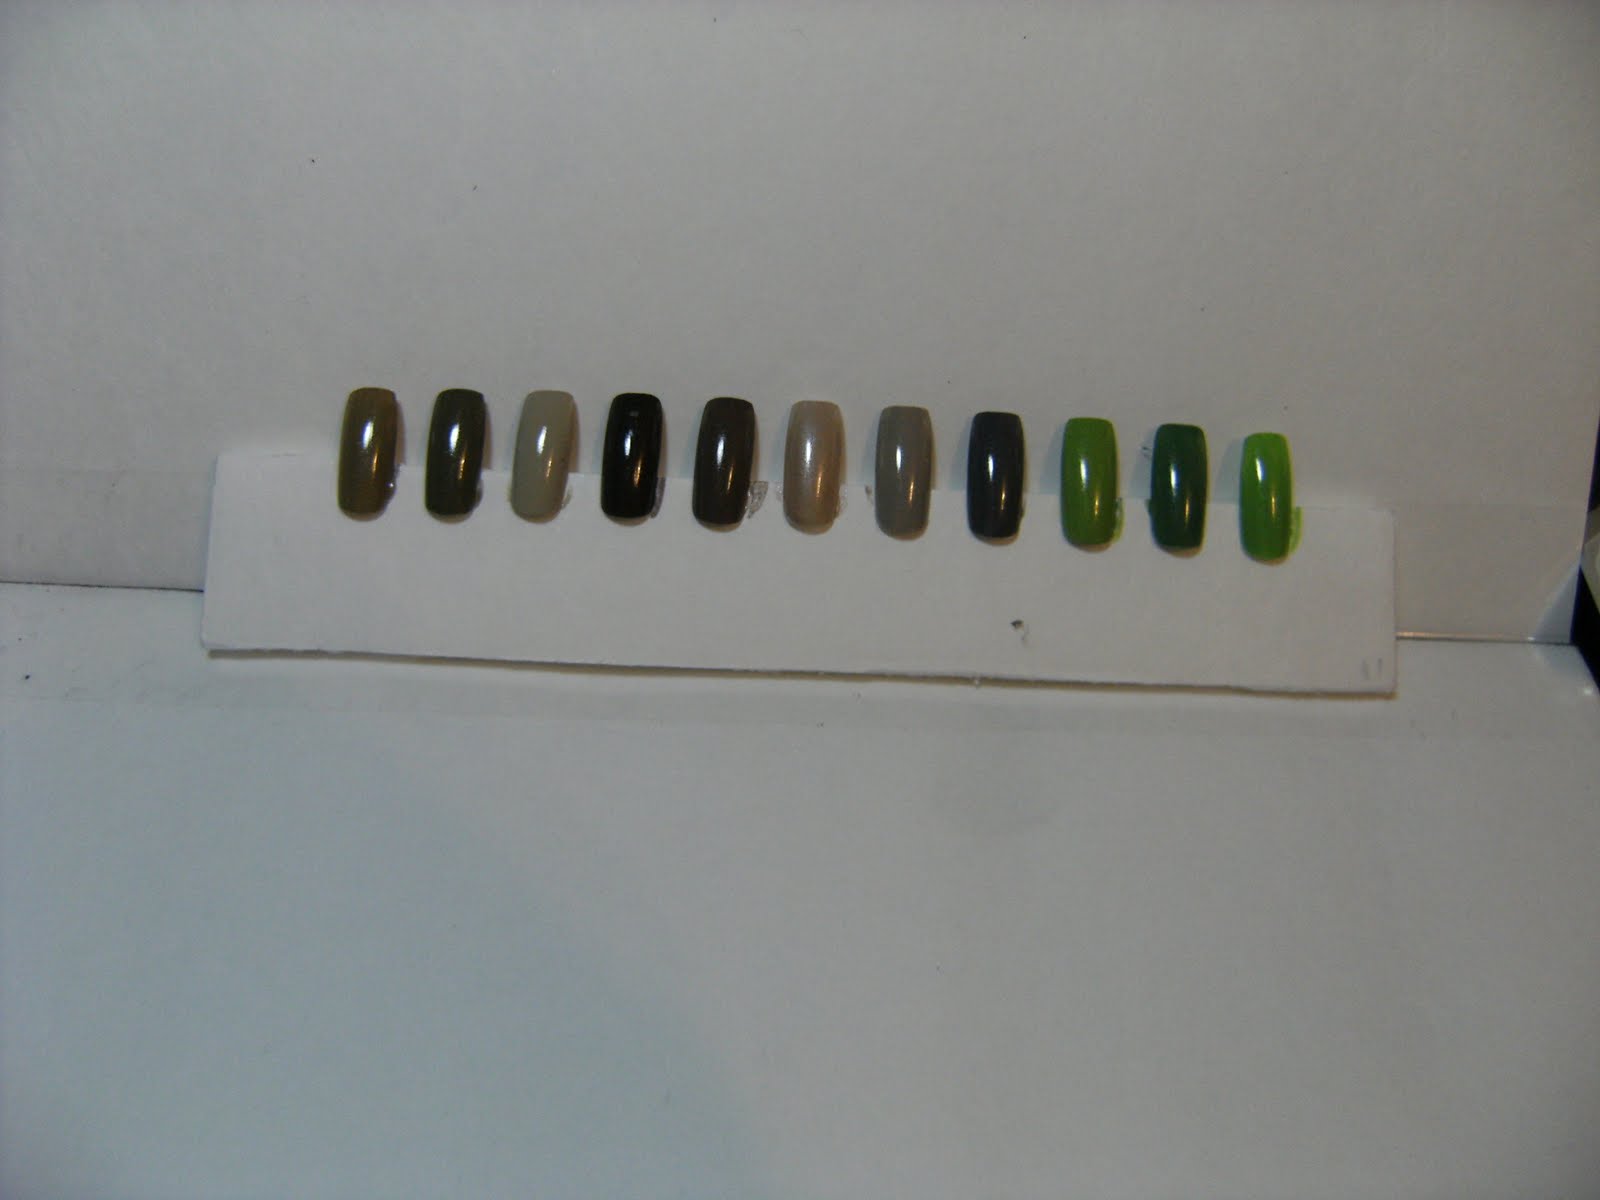
 These are ( 1/2 of ) my nail board things.....
They were super fun to make & took a long time ~  I'm very happy with them
 I couldn't have a post with out a photo - I will do a post on these soon

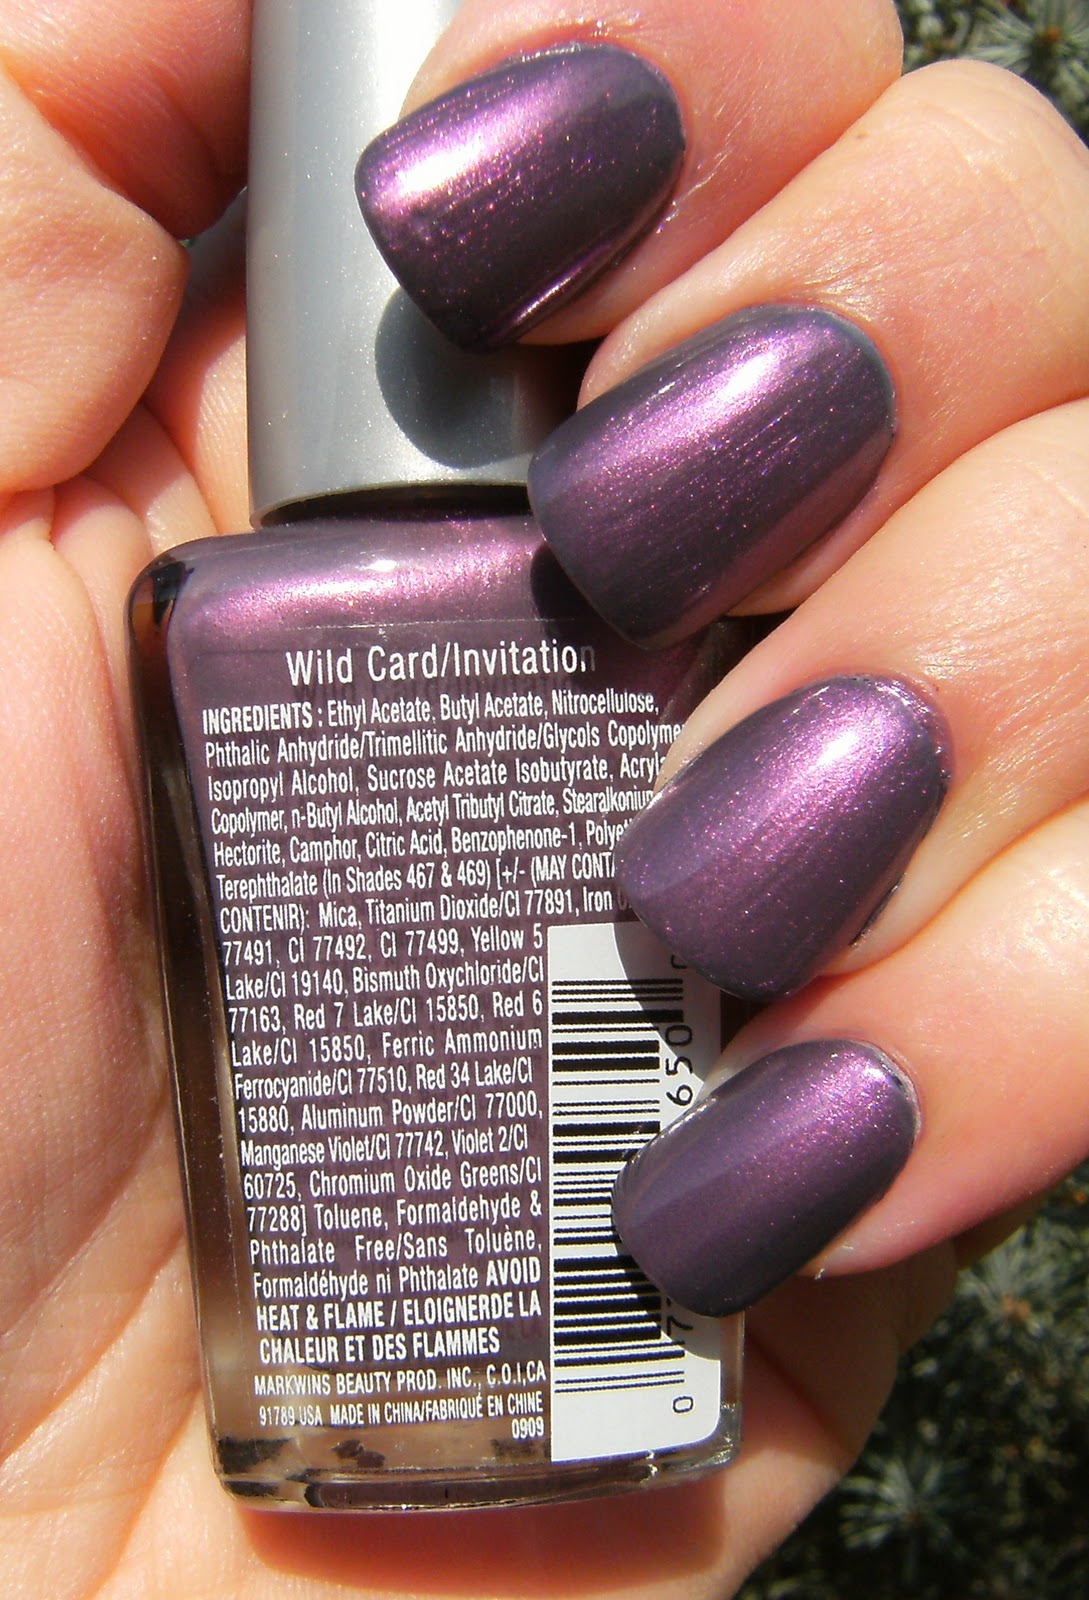
I have read a few blogs recently with people in cuticle crisis, and have been wanting to do a post about it.


Here are a few things I do and some thoughts on the subject.


Here is the gist of this long *ss post........


♥ NO Cuticle Remover - apply blob of lotion to soften this area ( keep reading for more info on this )
♥ NO Cuticle cutting
♥ Lotion Lotion Lotion
♥ barrier cream to cuticle area AFTER lotion
♥ Use a non-dryng soap  (♥♥♥ or try to ♥♥♥)
♥ Dry hands thoroughly after washing
♥ Apply moisturizer to hands, BEFORE polish Removal
♥ Apply a good barrier cream or moisturizer to cuticle area before painting
♥ Do the lotion and glove thing overnight - you cont need fancy gloves, $1 store gloves are fine
♥ Look in the mirror every morning, and hold your hands out in front of you, with your nails facing the mirror, and say 3 times, "You're beautiful, You're amazing.... You're a Star"


Okay ~ I don't do all these things all the time, ( except the last one, that I do EVERY DAY ) but I definitely never ever use cuticle remover, and I never cut anything. I get a hangnail on my ring fingers ( BOTH!) in fall time, when that happens I just add a dab of nail glue to it, and if I have to i snip it off I do with a sharp pair of nail scissors then add a dab nail glue to it( seriously ). I have enough cuts on my hands due to my activities and clumsiness, the dread and memory of that kind of pain of cut cuticles and hangnails keeps me in line!


Firstly, cuticle remover..... what does this stuff do exactly? I know I bought some a long, long time ago, but I did not find that it did anything amazing, how is it removing your cuticles? these are questions you need to ask yourself if you use this product.


If you apply a blob of moisturizer along your nail bed, cuticles and the sides of your nails and leave it there for five minutes, the tough skin that is attached to your actual nail, will become pliable and moveable, you will be able to scrape and push away any skin with an orangewood stick or any other impliment.


I personally have not used cuticle remover creams or gels in a long time. If it is necessary, I will just slap on a  blob of any type of lotion, and allow it to sit on my nail bed and cuticles to soften the skin in this area, then gently push and move the dried layer of skin. I hardle ever do this, though. I think i lucked out by having healthy cuticles. But more than luck is I take time to take care of my cuticle everyday


 I think that with all the cooties and germs out there in the world, cuticle cutting would just be a big NO. If you have a painful hangnail, maybe snipping it off with a tiny sharp pair of manicure scissors would be ideal, then slapping on either nail glue or any another water resistant glue ( i do this all the time for small surface scratches = which i have alot of ) Cutting your cuticle will create way more problems then it will solve. I cant say I have seen any pair of hands that were so hideous I would  recommend cuticle cutting -  I think devoting time to applying good moisturizer or barrier creme to the cuticle area, will be much better in the long run then cutting the cuticle area.


If you feel that your cuticles are unruly and a horrific sight - you will likely not do any one thing today, and devote 5 minutes to it and then wake up tomorrow with super-model cuticles, sorry - it will take a while and bit more effort than that.


I am extremely interested to hear what ratio of people who use cuticle remover creams or gels, who also have alot of hang nails and cuticle problems. My belief is that these creams and gels are a mild acid, eating away at your skin, nothing good will come of that, and I would strongly encourage anyone using these products to find other ways to deal with their cuticles.


I would label myself with sensitive / dry skin, I have used some soaps that are sooooo drying, I have to wonder what is in them. If you wash your hands a thousand times a day, like me; then it's a good idea to invest in a good quality of soap. I also very rarely let my hands air dry, I try to dry them properly, and apply lotion if possible and when necessary.


I use a plain lotion from the grocery store - St Ives... something something. Nothing fancy. I think the fact that I use it often, and not the type it is =  is what is important.

Before I remove my polish I try to apply moistureizer to my hands and nail area, it makes removal a little more goo-ey-er, but this helps to prevent the drying out of my fingertips and cuticles. I sometimes where a latex glove on the other hand ( the one i am not removing polish from )


Before I apply polish, I make sure to apply Avon Moisture Therapy hand creme with a tiny brush, to the skin surrounding my nails, and take time to get it along my cuticles and under my nail tips along the free edge - a little overkill~ but I usually do an acetone clean up before I take photos, this helps me get rid of any polish mistakes alot easier, and the Avon Moisture Therapy hand creme acts as a protective barrier so the acetone doesn't sink in and dry out my cuticles and the skin around my nails.


When I apply lotion to my hands, I make sure to pack the lotion into my cuticle area, along the sides of my nail bed and try to do this often. Sometimes, I apply lotion and wear gloves over night~ Just cheap gloves from the dollarama, I have a few pairs and don't think there is anything magical about those 'moisturizing ' gloves I have seen around.

 Whew - I think thats it for now, I am sure I have a few more things to add.......

♥ Wet n' Wild - 'Rain Check' ♥


( grrr, why didnt this post - I posted it at the same time as my post below - DANG! )


Ahhhhhh! Another Wet n' Wild stunner - although this polish is sorta frosty as long as the brush strokes are straight, I'm good. This is a really pretty colour ~ I thought it would be much more silver IRL, but the light lavender is very noticeable in most lighting conditions. = LOVE IT! In Canada, these are $1.57 ( walmart) and $1.87 ( Zellers Dept store ). In my town, I had found that Zellers carries the best selection as well as entire line-up of Wet n' Wild products, while Walmart only has a select few of these Wet n' Wild Wild Shine polish's.

Any other Canadian chicks think we should start a petition to get Pure Ice brand of polish's up here......?????? I am surprised that the Bari line of cosmetics is not available in Canada yet.♥


another sun pic

shade

Indoor flourescent


♥ Wet n' Wild - 'Wild Card' ♥

 Wet n' Wild 'Wild Card' 1 coat over two coats of a pigeon Grey franken I recently made..... no T.C.


 Wow - Google has changed their blogger draft/photo upload thing-y again = I was a  little miffed at first but now I love it! Just in case anyone logs on and freaks out like I did - basically they are FORCING you to add all your photos to Picasa, instead of being allowed to upload them from your computer.

I have previously worn his beautiful and inexpensive Wet n' Wild Polish, 'Wild Card' but did not take a photo of it in the sunshine. I was wearing a very nice franken I made but totally trashed my nails with all the crafty things I had done earlier in the day = so I slapped on a coat of this pretty polish. Unfortunately it couldn't hide all the gouges and scratches, but it was a nice save for the rest of the evening.

I am still impressed with these new Wet n' Wild polish colours that have recently come out, as well as thier older ones. I cant believe I overlooked them for so long!


 above; the franken I started out with..............no Top Coat


angela kohler

Gorgeous color in these shots of Jayma Mays

Photos by Angela Kohler.

Tuesday, April 27, 2010

Blushers for the Skin

The purpose of a blusher is to highlight your skin's natural hue. Think of it as an enhancer rather than a make-up element. It needs to add that essential depth to the skin.

Image Source: 4.bp.blogspot.com

A good way to find the right color for your skin is to bend over and try touching your toes. When you stand up, your face will be flushed. Note the color as that is the ideal shade for your blusher. If you are still looking for precise colors and, if you have got a fair skin try peaches and pale pinks. Women with wheatish complexions can opt for peach, apricot and coral shades. And, dusky women can use deep pinks, apricots and beiges. However, peaches and pinks are the two shades that go with just about any skin tone. They can be used during the day, and darker ones like bronze and shimmer can be used for the nights.

Always start out small; apply blusher sparingly. Moreover, the body heat can warm the blusher to a more intense color. Put just enough to give your skin a natural glow. If you are not definite about how much is enough, stop after two three brush strokes.

Opt for blusher brushes that consists of rounded bristles. Better yet, go for ones that are made of real hair. Wash your blushers regularly with shampoo to make it last for a longer time. Brushes can harbor bacteria if not properly cleaned. Hence, wash them fortnightly with a gentle shampoo and keep them on a paper towel to air dry. To speed up the process you can also use a hair dryer on its lowest setting.

Finally, never use the little brushes that come free with the blushers as they can be quite harsh on the skin. The skin on your cheekbones are quite sensitive, hence invest in some good brushes.

copyright@2010FaYo.in

How to Apply Blushers

Firstly, prep your face up by dabbing on your regular foundation. Apply a small amount of bronzer powder to the forehead, nose and chin. Now, look into the mirror and give your best smile; you can notice the apple of your cheeks. Remember, cheeks are one of the most prominent part of the face. Plunge your brush into the blush powder, dust of the excess and stroke on the apple of your cheeks. Use an up and down vertical movement. Assure that the color spreads evenly. To blend the blusher well, you now have to use horizontal movements. Gently remove the excess color with a neat tissue or a puff. Finally, top it off with some loose powder. For more form and structure, use a deeper shade in the hallow of your cheeks to give your skin a glowing, healthy look.

Image Source: Bharatstudent.com

Always apply blushers before you do your eyes or lips to maintain a perfect balance. Otherwise, you might end up putting more than essential. Powder blush is the best bet for beginners and is recommended for daily use as well. It is also advisable for people with greasy, oily or combination skins. Nevertheless it suits most skin types and is the easiest to handle. People with oily skin can also make use of liquid and gel blushes as it gives a very natural look. It can be applied over foundation or directly onto the bare skin. You can then dab some powder on top.

Cream blushers are great for dry skin as it consists moisturizer. However, you need to be careful of blending it well as excess amount can appear too loud. Some experts recommend powder blush as the most appropriate one for all skin types as liquid, gel and cream blushers make the skin more susceptible to dust particles that block the pores by causing the skin to break out.

A good blusher can improve the shape of your face by adding up the natural color and highlighting or softening your cheekbones. It can give a round face the illusion of appearing slimmer and vice versa. Blushers can also be used as eye shadows and lipsticks by mixing it with lip gloss, lip balm or Vaseline. So, as you see there is no end to what a blusher can do.

copyright@2010FaYo.in

Skin Care for the Winter

Image Source: Medimanage.com

o If you are in the habit of taking brisk winter walks, assure you drink plenty of fluid as you dehydrate quite easily.

o Keep your skin moisturized at all times. If you have an oily skin, use an oil-free moisturizer. Opt for a heavy night cream. Nevertheless, it is advisable to wipe off the excess cream around the eyes as it may lead to puffiness. Keep your hands, feet, legs and arms moisturized with a good body lotion.

o Do not shower more than once a day. Mix a few drops of bath oil while you bathe. This leaves a thin film of oil on the skin, which will help thwart loss of moisture from the skin, making it look fresh and soft.

o Do not leave home with wet skin or lips as it can appear chapped, almost instantly. The lips lack oil glands of their own, which is why they get so easily chapped during winter. Hence, extra care is required to protect lips from cracking. Make use of a lip balm or a salve during the day. As far as possible avoid wearing lipsticks, especially the matte types, as they are quite drying.

o It is advisable to drink something hot before you step outdoors, this will help in keeping the body warm. Also, avoid extremes of temperature. For instance, do not step out into the cold after warming yourself in front of a heater.

o Finally, keep a check on your diet and stay away from alcohol. Eat plenty of salads and fruits and assure you drink lots of water.

copyright@2010FaYo.in

Skin Care - A Complete Guide

We all know that our skin can never look the same all through our life. We could have had great skin in our teens or 20's, but with each passing year the skin type changes. Here's what you need to know on how to keep your skin looking fresh for life.

The Teens:

o Even if you endowed with good skin, assure you follow a regular skin care routine of cleansing, toning and moisturizing.

o Cleanse your face regularly twice a day, and make use of a good sunscreen.

o If you skin tends to break out or is acne prone, never ignore it and get it checked by a dermatologist as early as possible.

o Maintain a proper diet. Have lots of fruits and vegetables and drink lots of water.

The 20's:

o Check for any fine lines and wrinkles and keep your skin moisturized at all times.

o Never forget the wonders of sunscreen. Apply it even if you are indoors.

o Cleanse your face twice a day and never go to bed with your make-up on.

o Exfoliation should be a part of your skin care routine. Nevertheless, don't exfoliate too often. Once in a fortnight is suffice.

o Follow the usual skin care regimen.

The 30's:

o Your skin needs more care now than ever before. If you have not safeguarded your skin from the damaging rays of the sun, this is when the effects will start showing up.

o Apply a night cream regularly. The skin works effectively in the night. It tends to soak more.

o Never keep your skin dry as it cause a lot of damage. Opt for a good moisturizer that suits your skin type.

o A good facial once or twice a month is advisable to keep the skin fresh and glowing.

The 40's and 50's:

o The skin undergoes a lot of changes now. This is when menopause sets in causing more problems, both physically and mentally.

o Adopt a good skin care regimen.

o When it doubt, get the opinion of a good beautician or dermatologist.

o Fine lines and wrinkles tend to become more visible if proper attention is not given to the skin.

o Opt for a good night cream and follow a healthy diet.

copyright@2010FaYo.in

Skin Type and Recognition

Image Source: Images.teamsugar.com
Oily Skin:

Oily skin has shiny, thick and big pores. It is due to the over activity of the sebaceous glands. People with oily skin are more prone to whiteheads and blackheads. But, since it has a lot of moisture on its own, it slows the aging process.

Dry Skin:

Dry skin is basically thin and fine pored. It feels tight because of the inactivity of the sebaceous glands. Since very less oil is secreted, it makes the skin look dull and dehydrated. People with dry skin tend to get wrinkles early.

Combination Skin:

Combination skin is the most common skin type. The sebaceous glands are not evenly distributed. It is oily in the T-zone [ forehead, nose, mouth and chin tends to be oily] whereas the cheeks and other portions remain dry, resulting in a patchy skin.

Sensitive Skin:

Both oily and dry skin can be sensitive. It has thin, delicate and fine pores. People with this type of skin are sensitive to certain cosmetics, food, alcohol or even emotional issues.

Recognition of Skin Type:

It is important to know your skin type and use products accordingly. But, many tend to get confused and get into wrong conclusions. Here is an easy way to recognize your skin type.

Clean your skin well with a good cleanser. Do not apply any cream on your face. When you wake up in the morning, before you wash your face, place a tissue paper against it. Press it lightly and take a look at the tissue paper. If the tissue paper is dry, your skin is dry. If it is oily, then you have an oily skin. If it is oily in the T-zone and the remaining areas are dry, your skin belongs to the combination category.

copyright@2010FaYo.in

Moisturizer and Its Importance

The cold season causes the skin's natural moisturizer to dissolve because of climatic changes, that is why the skin begins to feel stretchy. The key to defend the skin from drying and getting chapped, is to keep it moisturized at all times. It keeps the skin soft, supple and also helps in delaying premature aging. So how to go about selecting the right moisturizer amidst hundreds of them?


It is a myth that moisturizers actually hydrate the skin. The fact is that, moisturizers lock the skin's own moisture to prevent it from drying and cracking. The more oil a moisturizer has, the more effectual it is in protecting your skin.

Basically moisturizers are of two types; 'oil-in-water' and 'water-in-oil' emulsions. The ones you select should suit your skin type. People with oily skin can use oil -free moisturizer, while a water -based moisturizer with a little oil is best for dry skin. For combination skin, an oil-free product should be used on the greasy areas and a light moisturizer can be used on the dry areas.

Stay away from scented fragrances or, opt for ones where the fragrance is at the bottom of the ingredient list. This ensures that it isn't one of the chief ingredients. Go for the most natural ones. Look for ingredients such as lactic acid, glycerin, urea, liquid paraffin and lanolin.

Apply moisturizers regularly and generously twice a day. It is best when applied to moist skin, perhaps after a shower or a bath. While applying, use an upward circular motion and assure that you don't stretch it harshly. The best way to apply a moisturizer is to take a little on your fingertips and gently apply it, instead of spreading the moisturizer on the palms and smearing it on the face.

copyright@2010FaYo.in

How to Find a Flattering Swim Suit

When you hit the pool, the last thing you want to worry about is your swimsuit. Hiding under an oversized t-shirt or grandma's trunks can get sloppy. A swimsuit is the most difficult garment to shop for, as it confronts our body shape like no other garment does. It might seem that swimsuits do not allow you to hide anything. On the other hand, with the right kind of swimsuits, you can enhance or camouflage a lot.

But how do you find the right kind of swimsuit?

First do a body assessment. Find out your best features and understand what you need to highlight or hide. It isn't about how much skin you show but its all about how you show. The key is to create an illusion of a balanced figure.

Check it from all angles. Note the straps and the elastics in the legs - be especially choosy and fussy while selecting a swimsuit. The straps or the elastics should not dig into the skin. Generally suits with high necklines, built-in-bras or thick straps offer support and reduce digging in. Concealed under wires give a flawless and smooth appearance.

Lift your arms up to check that the stretch is comfortable enough. The bottom of the swimsuit should not ride up. Try a size larger than you generally wear for a better fit. While trying, bend over, stand, sit, walk and assure that it is comfortable from all angles. Matte fabrics and dark hues are the most slimming.

What you wear on top of your swimsuit talks so much about your style as the swimsuit itself. A crisp, white unbuttoned shirt and a sarong at the waist is quite chic and cool. Wear your sarong low on the hip and opt for floral patterns. Accessorize it with a large, trendy bag or a pair of cool sandals. Just remember, your overall look should make you feel comfortable and sexy.

copyright@2010FaYo.in

Wardrobe Tips- What Stays in and What Goes Out

Experts say that we wear only 20 percent of what we own. So what happens to the remaining 80 percent? Check your wardrobe periodically for things you do not wear or use. Find out what needs repair or what needs to go out of your wardrobe. You might then end up wearing 80 percent of what you have or perhaps more.

What remains ?

Lets pieces that have stories [exclusive attachments on the fabrics] , characters and memories remain. Haven't you often yanked your mother's loose pants or shirts out of her wardrobe? And let that old sweater your grandma knitted for you stay. We all know that the old fashions return with a bang. A revamped version of the same can be the hot look years later. Exclusive crafted items like brocade borders or embellishments are for keeps. Special accessories like scarves, Louis Vuitton bags, Gucci shoes or classically made items can stay too. Think before you can let your clannish jewelry reach the trash bin.

A tip: The ' I-have-nothing-to-wear,' syndrome hits everyone at some point. This means you have no idea of what is in your wardrobe. The key is to have pure coordinates or separates that you can mix and match to form various looks. Do not keep buying separates unnecessarily, until you are sure that you can coordinate with at least three pieces in your wardrobe.

What leaves?

We all like to preserve old things but not when it comes to scruffy clothes, dilapidated shoes or worn out styles. Also, let go of cheap items that have a small life span. They can all leave your wardrobe. Never let your heart rule. Clothes and pieces that you haven't used for more than two years should leave. Garments that have visited the tailor more than once should be dumped.

You can sell the discarded clothes at markets that buy second hand items. Or, they make good hand-me-downs for young siblings and cousins. Selling online is a good bet too. Nevertheless, the best thing is to do a bit of charity - give it to the orphanage.

copyright@2010FaYo.in

Organizing your Warbrobe

What if wardrobes could speak and clothes could say, 'we are exhausted'? You'd probably be throwing and restoring more often than you ever anticipated! But the lack of time and knowing how to do, prevents people from doing so. Here are few simple remedies for your howling wardrobe.

                                                          Image Source: Stylebakery.com

o Clothes wrapped with plastic bags can fade and lead to messy condensation of trapped dampness. A good way is to store them in old pillow covers [or cloth bags] with few cloves or lavender bags kept in. Keep the spices packed neatly in mesh bags or wrap them in pouches made of lining fabrics.

o Never overload. Do keep in mind, it's all about space in a wardrobe. The more space you have, the more organized you will feel. Avoid ornate hangers as they take in a lot of space and, opt for plastic ones that have good grip. Label your clothes and accessories to avoid chaos.

o Segregate clothes according to its types; arrange your tops, pants, skirts, shirts and knits in separate categories. It makes putting a look together simple. In addition, know how often you're going to use a particular garment. If they are hidden or difficult to find, you wouldn't bother wearing them for a long period, perhaps until you do your next cleaning.

o A stinking wardrobe can be due to shoes or old clothes. Keep spraying fresheners on periodical basis. Burning aromatic candles in the dressing room is quite pleasant, but you need to be careful about things flaming up. Alternatively, you can have a separate space for the storage of shoes.

copyright@2010FaYo.in

The Benefits of Skin Care

Image Source: Edinaskincare.com
Night Cream:

Typically, the skin should be left bare to breathe throughout the night. However, for dry or mature skin, after cleansing , apply a small amount of the night cream. Allow it to be for about 30 minutes. You can then wipe it off with a tissue paper because whatever good a night cream has to do, it will do in the first half an hour. It is not required after that.

Face Pack:

A good face pack can cleanse, refresh, rejuvenate, and exfoliate. It deep cleans and helps to prevent clogged pores, loosen blackheads, eliminate dirt etc. It should be used at least twice a week, depending on your skin type. Though there are numerous face packs available in the market, home made packs are the best. You can use honey, sugar, cucumber , cream, vegetables etc, depending on your skin type.

Scrubber:

A scrubber or exfoliating mask is basically to remove the dead cells from the surface of the skin and to promote the growth of new cells. It increases the blood circulation by giving a nice glow to the skin. Use it once a week. Scrub a little hard on the places you have blackheads and wash it off later.

Sun block:

Use a good sun block whenever you step out in the sun. The harmful rays of the sun and the pollution can damage the skin immensely. Long exposure to the sun can even lead to skin cancer. Even if you are indoors it is advisable to apply a small amount of sunscreen.

Facial:

Besides the regular skin care regimen, a monthly facial is a must. Visit a beauty salon that is good in hygiene and assure that the beauticians are experienced enough. Wrong treatment or wrong use of products can prove fatal to the skin. You can also do a facial at home easily with the natural products.

Diet:

A good diet that includes green vegetables and fruits is as crucial as a facial for a perfect complexion. Drink a minimum of 10 to 12 glasses a day as in helps in cleaning the system. Finally, practice the art of staying happy. No amount of skin care can be beneficial if you are constantly under stress or worrying about something or the other.

copyright@2010FaYo.in

Few Beauty Secrets Every Teenager Should Know

We've read several beauty rules but only a few are worth keeping. Here are few tips every teenager should know.

Image Source: Joytonight.com

o Skip the foundation if your skin is acne prone. Foundation can cover up your natural beauty and sometimes can make you look older than you actually are. Leave the foundation for the mature skin.

o Cover the blemishes with a concealer. It is the best bet for acne-prone skin. Follow it with a pressed powder; it gives your skin a fresh glow.

o When it comes to make-up, less is always more. No matter what your age, too much make-up can make you appear dowdy.

o Either play up your lips or eyes, but never both. If you prefer to do a heavy eye make-up, keep your lips simple with just a bit of gloss. Alternatively, if you are wearing a heavy lipstick shade, keep your eyes simple.

o Scrubs are great, especially for dry skin. But make sure to slather on a thick moisturizer afterward.

o Never ignore the wonders of sunscreen. Whether you're indoors or outdoors, make sure you always wear a sunscreen.

o Layers look chic on any hair type; curly, straight or wavy. It can make thin hair appear bulky or curly hair appear manageable.

o When you are still a teenager, it is not essential that you get a manicure or pedicure done on regular basis. Just make sure you keep them clean and at the same length.

o If your skin is acne or pimple prone, visit a dermatologist. Look for a reputed doctor and get your skin tested at the earliest possible. It is the best investment you'll ever make.

o Finally, know your best feature and play it up. We all have at least one key feature that really stands out- find out yours and make it work for you.

copyright@2010FaYo.in

Spring Hair Worries

Our hair has it rough all year long. The damp monsoons leave it limp and lifeless, scorching summer causes sun damage, the soggy winter days are a combination of dryness, frizz and tangles. And, needless to say spring has the worst effects. Here are few remedies.

Image Source: Celebhairstyle.files.wordpress.com

Dullness:

To bring in some life to your hair, add few highlights or apply a clear gloss to increase shine. Alternatively, you can use a cream or gel with silicone, before you style your hair. This takes away the dullness to some extent.

Sun burnt Hair:

Exposure to the harmful rays of the sun can damage the hair. This can make your hair appear brittle, weak, dry and dull. Choose hair products that contain sunscreen. In addition, wear a bandanna or a scarf when you are out in the sun.

Dry Ends:

Trim your hair at least once in six weeks, to prevent the dry ends from getting worse. Make use of a conditioner that is richer than your summer conditioner. If possible, opt for an ultra-moisturizing hair mask every week.

Unmanageable Hair:

To weigh your hair down apply some leave-in conditioner, before you style your hair. If your hair is dry apply a small amount of shine serum with your hands. You can also mist a light doze of hair spray to cover the dryness.

Hat head:

Before you put on your hat, make sure that your hair is dry. If your hair is wet and dries under the cap, you may end up getting frizzy hair after you remove the hat. If you have long hair, gather it into a ponytail and then wear your hat. With this type of hairdo, you're less likely to end up with a hat head.

copyright@2010FaYo.in

Beauty is Indeed Skin Deep

The skin is the body's first and foremost shield against environmental impurities that can cause premature wrinkles and aging. Hence, it is only fair that we take proper take care to maintain it to the best of our ability. Here are few tips.

Image Source: Helpfulhealthtips.com

o Rose water can be added to a tub of chilled water. Splash it several times a day, as it keeps your skin fresh and glowing.

o Acne and pimples can be irritating as it can spoil the overall look. Stick to the regular skin care routine and apply crushed mint on the affected areas on daily basis.

o To lighten the visible marks on the face, grind the dry orange peels into a powder form and mix it with a little milk. Apply this mixture to the face to reduce the ugly marks.

o Keep chilled tea bags or cucumber pieces on your eyes for sometime every day. This keeps your eyes fresh throughout the day.

o To remove blackheads, mix lemon and tomato juice and apply it after steaming your face. Never try to fiddle with them, as you may end up having visible scars.

o For great looking hair, mix two yolks of eggs and massage it thoroughly on the scalp. Leave it for around 30 minutes to an hour and wash it off with a fragrant filled shampoo to remove the stink.

o Massage your hands and legs with olive oil every night before you go to bed. This not only softens the skin, but strengthens the nails as well.

o For wonderful looking feet, soak your feet in a basin filled with warm water. Add a little salt and mild shampoo to it. Soak in your feet for at least 10 minutes, to soften and avoid cracking of the heels.

o Exercising is essential for a well-toned body. Make it a point to walk for at least 30 minutes everyday. Use the stairs instead of the lift.

o Finally, eating the right kind of food can often keep your skin healthy and glowing. Remember, the key to a healthy skin is a regulated diet which is the norm all over the world.

copyright@2010FaYo.in

Shoes - Tips & Tricks

 Image Source: Banglarfashion.com
If you have thick ankles do not wear flimsy, strappy heels. Avoid ankle straps which cut across the ankle. Stay away from ballerina -style shoes as well, as they make your ankles appear thicker than they actually are.

People with skinny legs should avoid thin, wobbling heels as they will only make you appear thinner. On the other hand, if your feet is too big, stick to shoes or sandals that cover them at their widest point. While wearing sandals, opt for ones that have small heels as they make your calves appear thinner.

If you are pear shaped [ thin on the top and large on the bottom half], shun the petite kitten heels. It will not balance your overall look. Jeans, pants and trousers should fall to the bottom of the heel.

You do not always have to wobble in high heels to look hip. Flat sandals or flip-flops look great when paired with the right kind of outfit. However, avoid wearing them with tailored clothes, like suits, formal skirts or trousers. Flats look best when teamed with laid back clothing such as cropped pants or jeans.

Black shoes look best when teamed with darker colors. Hence, avoid black shoes with light-colored clothing unless they are exceptionally exquisite.

Shoes and bags can complete your overall look. Make sure that they complement each other. A safe bet is to first take care of the shoes to make it work with your outfit. Then choose a bag that compliments the overall look.

Finally, assure that your feet is well-maintained. Chipped nail polish or dry skin is a big turn -off.

copyright@2010FaYo.in

Pear Shaped Body Type

Pear Shaped figures are a couple of sizes smaller above the waist and larger below. The hips are basically wider than the shoulders and the thighs are rounded. They usually have a small top-half and a flat stomach. The idea is to draw the attention away from the lower half of the body for a more balanced and proportionate look. Here are few tips.

Image Source: Img2.timeinc.net

o A-Line skirts or dresses that fall around or below the knee area draw attention away from the hips.

o Straight leg or a slight boot cut trouser leg works best on pear shaped figures. Stay away from hi-waist pants.

o Avoid pants that narrow at the bottom. In fact, avoid pieces that make you look wider at the bottom.

o Avoid light colored pants or skirts. In addition, stay away from heavy patterns, loud prints or details such as large pockets around the hips.

o V-necks, open collars or turtle necks brings the attention upwards to the face. Remember, the more flattering the neck line is, the more likely it is to draw the eye upwards.

o Stay away from very tight or baggy shirts and tops. Instead opt for fitted [ but not skin tight] shirts and tops or button front tops. Choose bold and bright colors on the top and keep your lower half simple.

o A wrap dress is an ideal addition to your wardrobe, as it drapes the body in such a way that the lower portion is camouflaged, while your best curves are highlighted.

o Avoid jackets that are too long as they can make your bottom half appear bigger.

o Use accessories to enhance your shape and look. Focus on accessorizing the upper portion of your body, instead of heavy belts and embellishments on the lower half.

o Accessories such as scarves, chunky necklaces and chandelier earrings can make you appear flirty and fun. However, do not load yourself with too many bulky pieces. The key is to maintain a balance.

copyright@2010FaYo.in

Apple Shaped Body Type

Apple shaped figures are generally heavier on the top than the bottom. The shape bears the resemblance to an inverted triangle. They have a heavy chest with narrow hips and thin legs. The key is to ideally divert the attention away from the upper body to create a proportionate silhouette. Here are few tips on it.

                                                           Image Source: Media.onsugar.com

o Boat necks and V-necks are for this body type as they can make the bosom appear smaller.

o Wear long tops to avoid highlighting the waist. Knits or woven fabrics with stretch go well with this body type.

o Tops should generally cover the hip area to bring in that perfect balance. Avoid shoulder pads. Empire cut tops, wrap tops and dresses can camouflage any extra weight in the waist section.

o Stay away from tops that include a lot of detailing and ruffling. Keep it simple and neat. Also, avoid tight or clingy tops that highlight your problematic areas.

o Choose flat front pants or trousers than the pleated ones. You can make use of detailing on your skirts and pants to draw attention there. Low-rise jeans with a boot cut looks fabulous on this body type.

o Play up long legs with short [an inch above the knee] skirts. You can also play with bright colors and patterns on your pants and skirts.

o You can choose monochromatic outfits as well, as they create an overall impression of length by drawing the attention away from your width.

o Play with accessories. Wear chandelier earring to bring the attention to your charming face. Classy shoes and boots can complete your overall look. Use belts to cinch your tops and dresses to the narrowest part of your waist.

copyright@2010FaYo.in
Related Posts Plugin for WordPress, Blogger...